
Best Free Fire Headshot Settings for Android (2026)
Getting consistent headshots in Free Fire requires balanced sensitivity settings, proper aiming, and regular practice. Start with General 185–195, Red Dot 175–190, 2X Scope 160–175, 4X Scope 145–165, Sniper Scope 80–100, and Free Look 120–145. Adjust these settings to suit your device and playing style, and practice drag shots to improve headshot accuracy. You also explore Free Fire optimization for more information about improving your overall gameplay experience.
These are starting numbers, not magic codes. You will still need to tweak them a little for your own device.
What Are the Best Free Fire Headshot Settings in 2026?
Here’s a clean starting setup most players can work with:
Setting | Recommended Range |
General | 185–195 |
Red Dot | 175–190 |
2X Scope | 160–175 |
4X Scope | 145–165 |
Sniper Scope | 80–100 |
Free Look | 120–145 |
Best Free Fire Sensitivity Settings for Headshots
Higher sensitivity makes short upward drags easier, but if you set it too high the crosshair flies past the head. Start somewhere in the middle of these ranges and change only one value at a time. If you’re unsure where to start, try our FF Sensitivity Generator to find settings that suit your phone.
General Sensitivity
Keep General between 185–195. This is the main setting that controls how fast your camera moves when you’re not scoped in. It’s the most important one for close-range fights.
Red Dot Sensitivity
175–190 works well for most one-tap attempts. If your shots keep going over the enemy’s head, drop it a few points.
2X and 4X Scope Sensitivity
Use 160–175 for 2X and 145–165 for 4X. Scoped shots need a bit more control, so these values are usually lower than General and Red Dot.
Sniper and Free Look Sensitivity
For snipers, 80–100 is a good range. Free Look can sit around 120–145 since you mainly use it for looking around, not for precise aiming.
Best Free Fire Button Size for Headshots
Fire button size and placement is important for best Free Fire Headshot Settings.
Fire Button Placement
Most players do well with a fire button around 42–52%. Place it where your thumb naturally rests so you can drag upward without shifting your whole hand.
Bigger buttons are easier to hit. Smaller ones give you more screen space. Test both and see what feels comfortable during a real fight.
One-Tap Headshot Settings
For one-tap shots you need two things working together: high enough General and Red Dot sensitivity, plus a fire button you can press without looking. Start the crosshair near the upper chest and make a short, controlled drag toward the head.
How to Get More One-Tap Headshots in Free Fire
Practice drag shots, adjust sensitivity, and keep your crosshair at head level for better one-tap headshots in Free Fire.Below we discuss some its one tap headshot technique.
Drag Headshot Technique
Don’t swipe the whole screen. Keep the movement short and smooth. Put the crosshair on the upper chest or neck, press fire, and drag upward just enough to reach the head.
Crosshair Placement
Try to keep your crosshair near head level even while you’re moving. When the enemy appears, you only need a small correction instead of a big flick from the ground.
Common One-Tap Mistakes
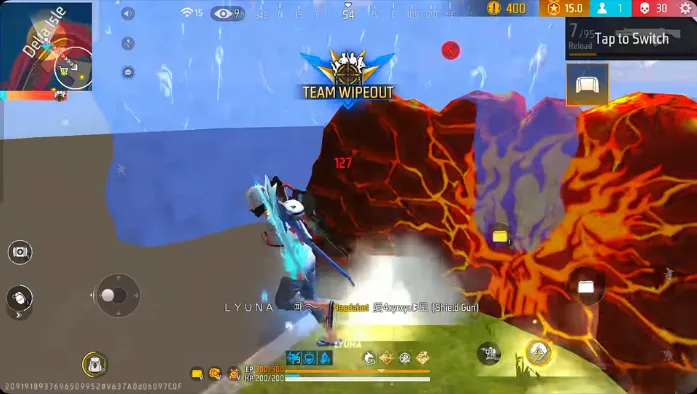
Most players mess up in the same ways:
- Maxing every sensitivity slider
- Dragging way past the head
- Changing five settings at once
- Only practicing on standing dummies
- Copying a pro’s settings without testing
- Relying on auto headshot tools
Best Jump Headshot Settings
Free Fire Headshot Settings are also important for jump headshots, especially since they are usually performed during close-range fights.below we discuss some jump headshot sensitivity control teqnique.
Jump Headshot Sensitivity
You can use the same high General and Red Dot values (185–195 and 175–190). Just make sure you can still control the crosshair while you’re in the air.
Jump Headshot Technique
Jump first, keep the crosshair near the upper body, then do a short upward drag while firing. Timing is just as important as the settings. Practice this a few times in Training Mode until it feels natural.
A jump headshot is not a guaranteed kill. It works best when your movement, crosshair, and timing all line up.
Headshot Settings for Low-End and High-End Android Phones
Choose the right sensitivity settings for your device and practice regularly to improve your headshot accuracy in Free Fire.Below we discuss some low end and mid range devices.
Low-End Android Devices
On weaker phones, stable FPS matters more than high sensitivity. Drop graphics to Smooth, turn off extra effects, and close background apps. You may need to sit closer to the higher end of the sensitivity ranges to make up for slower response.
A smooth 30–40 FPS is better than a laggy high setting.
Mid-Range and High-End Devices
Better phones hold higher frame rates, which makes aiming feel smoother. Still, don’t just copy high numbers because your phone is powerful. Tune the settings based on how your aim actually feels.
Best Headshot Settings for Different Weapons
Adjust your sensitivity and aiming style for each weapon to improve accuracy and land more headshots in Free Fire. Below we discuss best headshot settings.
Desert Eagle
This is the classic one-tap weapon. Use a short, confident drag and place the crosshair near the upper chest before you fire. Accuracy matters more than speed here.
SMGs and Shotguns
These weapons work better with faster General and Red Dot sensitivity. Keep the crosshair around the upper body and make small corrections.
Assault Rifles
ARs need more control at medium range. If the crosshair feels shaky while spraying, lower the 2X and 4X values a bit instead of dropping everything.
Does DPI Improve Free Fire Headshots?
DPI alone does not magically improve headshots. Changing Android’s display density makes the screen feel different, but it is not an accuracy boost.
If your current touch response already feels comfortable, there’s no need to change your DPI. Simply apply the right Free Fire headshot settings and focus on improving your aim.
Do Headshot Panels, Macros, and Headshot Apps Work?
Headshot panels, macros, and third-party apps may claim to improve headshots, but results are not guaranteed. Some tools can violate Free Fire’s rules or put your account and device security at risk. Adjust in-game sensitivity settings and practice instead.
Headshot Panel and Panel APK
Anything promising an unlimited headshot panel, “real panel,” or panel APK download should be treated with caution. These are third-party files, not official Free Fire features. For more information, see the official Free Fire Anti-Hack FAQ.
Macro, Micro, and One-Tap Tools
Headshot macros, micro apps, and similar tools claim to automate your drag or tap. Even if one seemed to work, this kind of automation goes against Free Fire’s fair-play rules.
Why Manual Settings Are Better
Manual settings are free, safe, and actually improve your skill. You learn how sensitivity, crosshair placement, and timing work together instead of relying on a tool that can disappear.
How to Improve Headshots Without Third-Party Tools
After applying the right Free Fire headshot settings, follow these steps to improve your headshot accuracy:
Improve FPS and Graphics
Pick the graphics level your phone can hold steadily. Smooth frames help your aim more than fancy visuals.
Reduce Background Processes
Close other apps before you play to reduce background activity and keep the game running smoothly. If you experience app crashes or loading issues, check our guide on Truxenon FF Not Working for possible solutions.
Use Game Booster or Game Turbo
Most Android phones have a built-in Game Booster or Game Turbo mode.
Practice in Training Mode
Spend a lot of time in testing and practicing your settings, if these setting meet your requirnment.
Free Fire Headshot Tips and Tricks
A few practical habits that help more than any secret setting:
- Keep the crosshair near upper-body or head level
- Use short, controlled drags
- Adjust sensitivity slowly instead of jumping to extreme values
- Practice with the weapons you actually use in ranked
- Prioritize stable FPS over high graphics
- Stay away from panels, macros, and suspicious APKs
- Give yourself a few days to get used to any new settings
Most of the real improvement comes from consistency, not from finding one “perfect” number.
Common Headshot Setting Mistakes
The biggest mistakes are pretty simple:
- Maxing every sensitivity value
- Changing settings every match
- Using a fire button that feels awkward
- Thinking DPI alone will fix poor aim
- Trusting panel or macro videos as proof
No setting in the game can guarantee every shot will be a headshot.
Frequently Asked Questions
Conclusion
The best Free Fire headshot settings are simply the ones that feel predictable on your phone. Start with General : 185–195, Red Dot : 175–190, 2X : 160–175, 4X : 145–165, and Sniper : 80–100, then make small changes until the drag feels natural.
You don’t need panels, macros, or headshot apps. Stable performance, comfortable controls, good crosshair habits, and regular practice in Training Mode will take you further and keep your account safe.